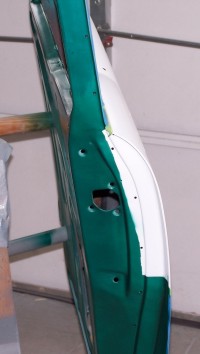
Green base coat was sprayed on the door jambs.
The taping off for this took several hours.
|

The clear hasn't been applied yet, but the Emerald Green metallic has
a shine even now.
|

The dash looks good, except for the smudge where
the air mask brushed it. We had to stop and sand this out, the retouch with
green base color before we could continue. Same thing with the glove
box lid that was bumped as well. But at least it shines.
|

Inside of driver front door.
|

Remember the gaping hole here? Believe it or not, most of this area
is metal! Only a little filler was used to smooth out the weld
seams.
|

The green base color was sprayed on the interior
surface of the doors to seal in the dust. The window mechanisms were
removed before spraying began.
|
Now that the doors
have the green base color on the edges and interior surfaces, the next
step is clear coat. Before the clear can be sprayed, the tape has to
be removed to uncover the white. By this time in the day, we are tired,
but the clear has to be sprayed within 24 hours of the white base color.
We are out of time and have to keep going.
|

I was the main wipe down and tack person, since
Kurt had to mix the paint.
|

The car had been covered to protect it while
we prepped for other things. Only one problem, those white painter
drop cloths left lint.
|
We sprayed the
clear on the doors separate from the clear on the car. This made our
job easier in some ways and harder in others. Since we were running
out of time on the 24 hr window on the white base in the trunk, we
hurried too much and forgot to tack around the trunk area before we
sprayed the clear on the car. Oh well, live and learn. A sharp razor
blade and a bit of buffing can repair the area.
|

The passenger
front door looks much better now.
|

The driver front door looks great here, but
what you can't see is a large run in the clear. Again, a sharp razor
blade and a buffer.
|
We chose to put the paint dividing line under the
weather stripping on the doors. That should hide the uneven edge.
|

The glove box door looks great on the inside. The
outside was accidentally brushed by Kurt's air mask during the spraying
and had to be retouched in the green base color. That was an easy fix.
|

Rear passenger door. Nothing wrong here.
|

Rear driver door looks terrific.
|

Ya gotta love that shiny dash!
|

After the 20 minute wait time, we pulled the
tape off certain areas where we had to spray the green the next day,
trying to get the edge of the clear to smooth out more.
|
| |

Betsy is really starting to look more like her
old self again.
|

Even the bad welds in the trunk don't look too bad. Since they are
being covered by the trunk mat and were in very difficult places
to do body work, Kurt decided to leave some of the bottom welds.
|
| To recap, Friday Day One we started
at 2pm and sprayed the white base coat on the doors and door jambs, as
well
as the trunk area, then taped off for the green base coat. Day Two, we
sprayed the green base on the doors and door jambs and dash. We had a
few problems and repairs to make, but was able to spray the clear in
the 24 hr window. Now, we have to wait 9 hours for the clear to dry,
so in the meantime, we will prep some other parts. |

A much better shot of the dash.
|

Day 3, Sunday, we started on the front fenders
and a few other parts that we had run out of time on the day before.
|

We sprayed the inside of the trunk lid first, with the exterior taped
off, so that we could spray the outside later.
|

The passenger front fender, after the clear. Without buffing, it has a good
shine.
|