
One last ride before she is stripped for painting.
She's a bit rough, but we can fix that.
|

The replacement passenger front fender was shipped in from AZ in 1992
using just the shipping labels you see here and some duct tape to
pad the
corners.
The original fender was damaged in an accident in 1990.
|

The driver front fender headlight cap had been replaced in the first
restoration in the 1980s, but the brazing was popping. So we started
looking for another replacement fender.
|

Since we didn't know what lay underneath the
1980's bondo layers and primer, we decided to go down to bare steel
as much as we could.
|

I got the job of heat stripping the roof. There
were so many layers of paint that huge sections came up at a time.
You can see one large piece in the lower right corner of this picture.
|

The ruddy brown primer was sprayed by my dad
in the 1980's. I think it was a heavy fill primer by Dupont. It was
hard to get through, no matter what we did.
|

Not sure, but I don't think the 1980's restoration
found this crease in the rear passenger door. The sharp, shallow
crease extended onto the front passenger door and was in an area
of both doors that was hard to get dollies into.
|

At least the hood is straight, with only a
few minor dings.
|

On the driver rear quarter panel, we found
a patchwork of waves covering most of the fender. I remember this
from the 1980's restoration, as it existed before I purchased the
car. Dad never completely cleaned all this out.
|

The deck lid seems straight, but the bottom
edge is eaten away by rust. Only two ways to fix that, a full skin
or welded in pieces.
|

The rear tailpan was replaced twice, once to
repair the rust and a second time to repair the damage caused by
running over a mailbox after the first pan had been installed. Oops!
Ya gotta hate sloped driverways.
|

Kurt chose to cut out and weld in new metal
for the bottom edge of the trunk lid.
|
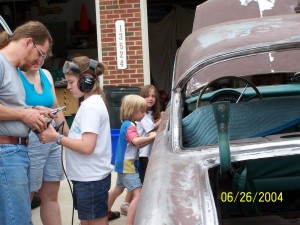
Sanding off the old paint became a family affair, especially when we allowed
the kids to try the power tools.
|

After stripping the paint on the driver door, Kurt found body putty. He
started cleaning that out and found 2 bullet holes. I never knew those
existed before!
|
| After several weeks of steady work,
all the old paint, primer, and putty had been removed. Despite the extreme
cancer on the floor pans, the main body was in relatively good shape.
Several dings and a few more major warped areas were all that was found.
Kurt pulled out the dollies and began what metal work he could reach.
Unfortunately, the worst spots were the doors and the bottom of the deck
lid. |

The rear passenger quarter panel has several
low spots.
|

The replacement front fender from AZ is in
great shape. However, the door edge and the cowl area are another
matter. Kurt metal worked the door edge as best as he could where
the fender had crumpled it in the accident. He had to cut and add
metal to the cowl corner where rust had eaten it away.
|

Extensive waves in the driver rear quarter
panel. Metal working was done, until parts started to "tin can".
What is left will have to be filled.
|

The trunk floor pan was replaced, as was the lower 4 inches around the
trunk. As these were Kurt's first welds, there is a lot of grinding
work to do.
|

The passenger taillight shows
the worst of the damage from the drop when the body was put back on the
frame.
|

The passenger taillight is rough from the welded
in metal, but it will be worked out. Most of the damage from the drop
was able to be pulled back out.
|
| |

The driver rear taillight shows moderate tweaking
from the drop.
|

The welds on the driver taillight are as rough
as the passenger taillight. Again, the damage from the drop was mostly
pulled out.
|

Welds that need some body work on the driver taillight
due to a previous accident from 1991.
|

Passenger taillight area has a larger welded in section, due to rust.
|

The passenger front fender was powdercoated to prevent rust back in the
headlight area.
|

The hood was powdercoated as well for durability.
|

The passenger front cowl had welded in metal. Kurt's later welds were
more even and easier to grid. However, this will still take a bit of
body work to dress out.
|

Another view of the passenger front cowl section.
|

Once all the metal was stripped, time for the
epoxy primer. In order to spray the primer to seal the steel, we
had to seal the body from the overspray, especially the areas that
had already been completed.
|

The driver rear dogleg looks much better after
metal work.
|


