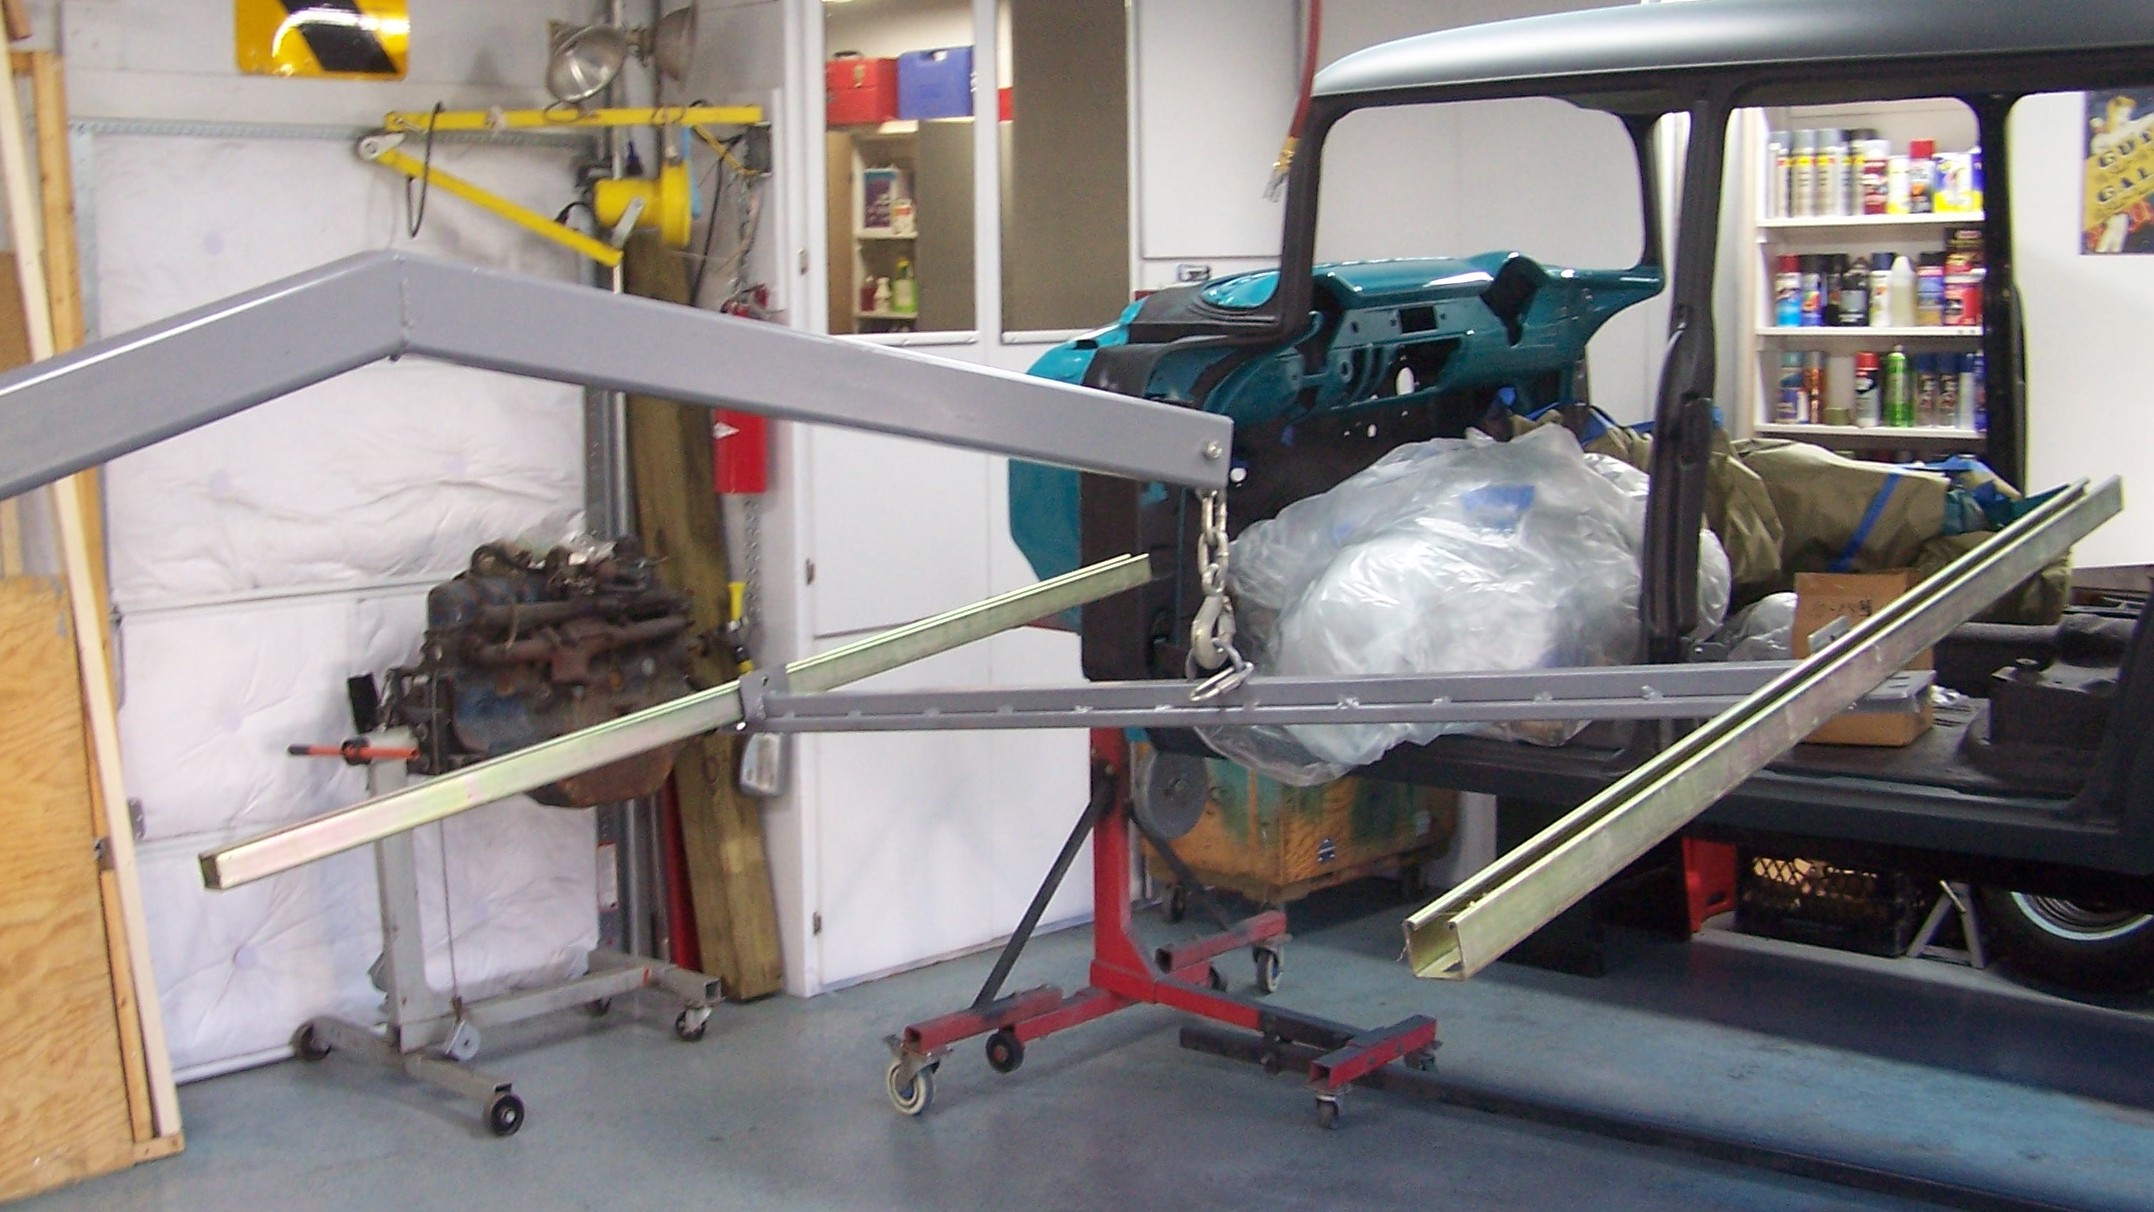
Kurt did some research and came up with what we hoped was a better way to lift the body off the rotisserie and put it back onto the frame. He built an extension for the engine hoist out of square stock metal and then built an H lifting frame out of miscellaneous heavy metal bracketry.
|

The completed lift system and the body ready for lifting. Ratcheting automotive tie downs would be used to secure the roof to the H frame.
|

The body was pushed over to make room for the frame in the garage.
|

The body mount areas were prepped for the mating of the body back to the frame.
|

The H frame was attached to the body using two heavy ratcheting straps.
|

As we started to pick up the weight with the H frame, the center support started to bow. We waited for a few minutes to ensure it would hold before removing the rotisserie.
|

The center support bowed a lot, but it held as we removed the rotisserie and rolled the body over the frame. We had to stabilize the body to keep it from swinging.
|

Only one problem. The bottom braces of the hoist had to go through the spot where the rear driver tire was. Jack stands were used to support the frame so the we could remove the tire.
|

The body was slowly and carefully rolled over the frame and the mounting points lined up.
|

The bow in the center support. Before we do this again, that is getting a much heavier steel beam. But with any luck, that will be a few years.
|

Slowly the body was lowered onto the mounting points.
|

The body is back on the frame, ready to have the doors and fenders refitted and aligned for the final putty work.
|

Anyone for a road trip?
|

Um, Houston we have a problem in the steering.
|

The passenger rear door was refitted, however, that large crease along with the rust made us pause and reconsider the optios for this door.
|

The driver rear door only had a bit of rust and some small dents. No real concerns here.
|

The front cowl could now be fixed without concern for body stability.
|

The replacement front fender was refitted. The passenger front door had so much damage that we started thinking about replaceing 2 doors.
|

The replacement driver front fender was refitted. Both fenders had to have holes welded up from some side marker lights that had been installed at some point.
|

The driver door evidently had a mirror mounted at some point that was ripped off. More damage to fix.
|

Once all the pieces had been remounted, the alignment was checked.
|

The driver side alignment is really good.
|

Ok, so we have the books that tell what the exact measurements should be for the gaps between the panels. A paint stir stick is simply easier and we've never seen a car that, after 50+ years, fits to the factory specs.
|

The passenger fender alignment is good as well, at the top. Keep this in mind as you continue to read this story.
|
It's a patchwork car, but finally starting to look like a car again. We assessed the work ahead and concluded it would be at least a year doing the body work as we were working on it in our spare time. Little did we know that it would be another 3 years before the car would be on the road again. Life kept interferring - two engine rebuilds on daily drivers, one car accident, surgery twice, and various other life issues took up the spare time.
Time to break out the putty. This is Kurt's wife's area as she has the lightweight touch to feel all the imperfections. For the next several months she worked on the body work while Kurt was able to work on other things.
|


