
The dash and interior at the time we started the tear down. The silver radio stands out in the black console. All those whitish flecks on the hood are what is left of the peeling clearcoat.
.
|

Unfortunately, we did not stop and take pictures before we started the welding and body work. My excuse is that I didn't want to remember the peeling clearcoat and it was just supposed to be a quick respray. Then I changed the color and what started out as simple became much less simple. The first step in the body work was to remove all the layers of paint, down to or past the original red.
|

Rally Girl looks so sad here. The dents in the nose cone are obvious, as is the peeling clearcoat. I had started on the driver rear fender and was working my way around the body, one panel at a time.
|

Note the dent in the nose cone behind where the license plate is normally mounted. We discussed options for getting that out of the plastic nose cone, but none were optimal.
|

The deck lid showed signs of two layers of green and clear, along with a gray sealer, the red, and another gray layer. Several other areas showed a base layer of lightweight filler.
|

There were minor dings all over the body. Those dressed out quickly.
|

Obviously the previous paint job had left the original red in the passenger compartment. We did as well.
|

Yes, this looks like something you would find in a salvage yard. The seats were removed to get them away from the bodywork dust. The "tombstone" center console and arm rest were removed to allow easier access for wiring. The interior plastic panels and door cards were removed to prevent damage. The binacle was removed because it was broke. I had received a new one Christmas 2017.
|

Once all the paint was removed, I started on the filler work. Note the rims. When we purchased Rally Girl, she came with 2 sets of rims. these and the factory original daisy wheels. We all liked these better.
|

One of the upgrade accessories for Rally Girl was a chrome grill that fills in her mouth and gives her a bright smile. To install it, the factory tie down hooks have to be removed. That was a fun couple of hours trying to break the rusted bolts loose with a box end wrench because that is all that would reach the bolt heads.
|

I had left the problematic nose cone for last, hoping for a miracle idea. To remove the dents, we would have to remove the nose cone and try a heat gun while pushing from the inside. This was supposed to be a quick job, and that would be many hours of work with low chance of success. We finally agreed on a highly flexible filler made for plastic bumpers.
|

The bonded panels and welded driver wheel well dressed out quickly. The nose cone took many hours.
|

After three weekends, everything was dressed out except the nose cone.
|

The passenger front wheel well had filler from a previous time. It was below all the layers of paint, so it could have been factory. But I suspect it was part of the previous paint job fixes.
|

The passenger compartment and light areas were masked off for the spray filler. The paint removal had left minor imperfections and we felt this would be the fastest way to give a smooth finished surface. And rather than risk the good looking rims, we put the original daisy wheels back on, just in case.
|
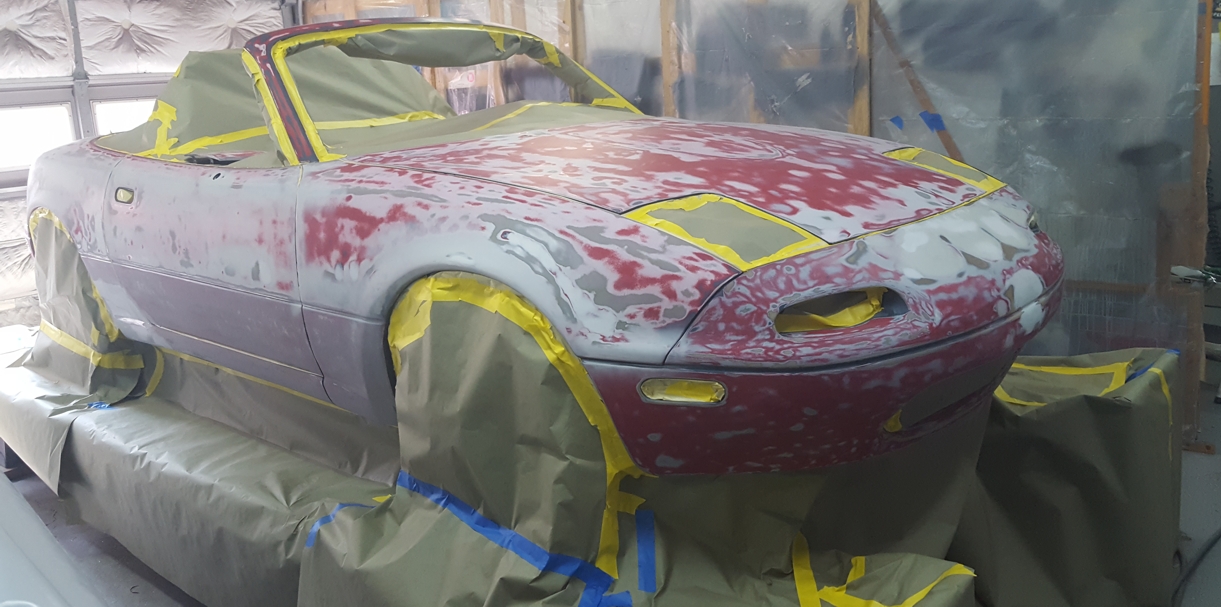
Everywhere that we did not want the filler had to be taped off. We backed taped most areas to give less of a hard tape line. The paper runs clear to the floor to protect the ramps and the undercarriage from overspray bounce.
|
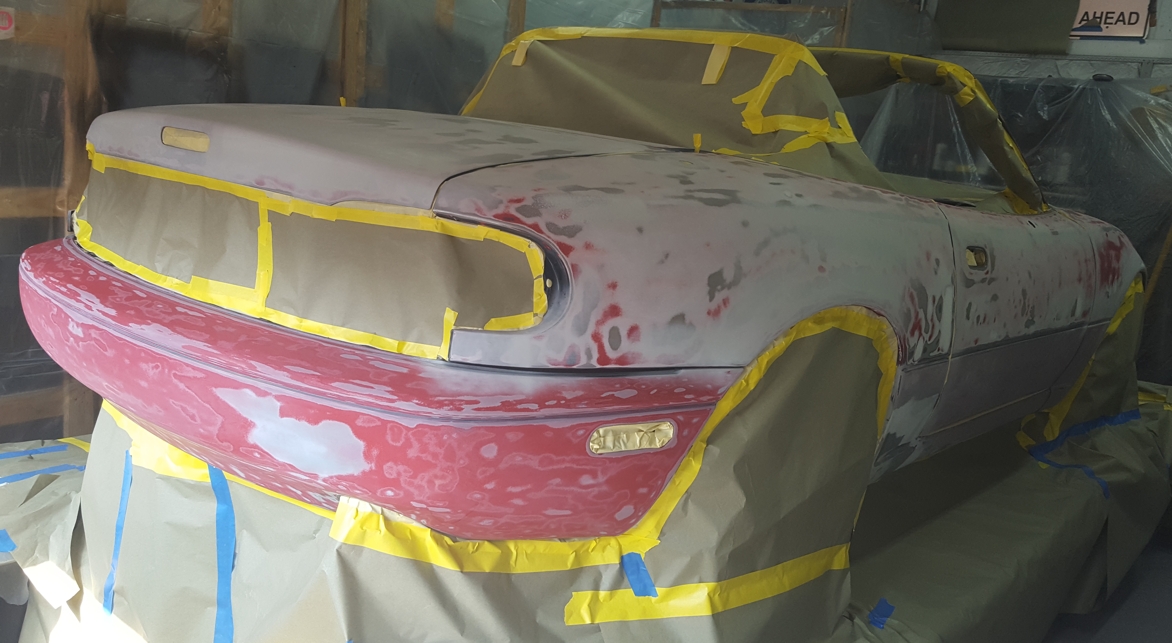
I was most concerned with the rear bumper. I sanded through the clear and green, then the gray seal coat into the red and expected to find the next gray seal coat. What I found was red plastic in many areas. I was concerned that we would not be able to smooth this out well.
|

Everything in the garage was covered and draped., including the walls, cabinets, tool boxes, and the Ranchero.
|

Ok, so I couldn't resist this shot. Rally Girl looks like she has fangs. This was not intentional, just the way the paper and tape worked out.
|

Due to extenuating circumstances, our son did the paint job on Rally Girl. This was his first time spraying the filler, so he used the drape as a test panel to get the spray gun set up correctly.
|

Since filler does not work the same as paint, Dad stepped in to give advice.
|

He practiced proper techniques to ensure that he could keep the airline out of the finished panel when spraying the color.
|

It took several fills of the spray gun container to get once around the body. The sprayable filler stays where it lands, so there is very little overspray.
|

Everyone that I showed this photo to agreed. This is a bad color for this little car. It's too pale.
|

Rally Girl is dry now and ready for the final blocking to provide a smooth level surface.
|

If you look closely, there are two different colors in the filler. It provides a built-in guide coat. The dark area in the center highlights a low area. The lighter area around shows what has already been sanded. The trick is to get the whole body to the same light color.
|

Even sunlight does not help this color.
|

The trunk lid was removed so that we could spray the bottom side.
|

The doors and headlight covers were also removed. Removing the doors allowed us to spray the door jambs. The hood will also be removed so that the inner lip of the fender can be sprayed.
|
Spraying the color would be divided up into 3 rounds. Round one would be the doors, inside of the trunk lid, the rear filler panel, and the mirrors. Round two would be the main body. Round three would be the hood, the outside of the trunk lid, and the headlight covers.
The next page shows the painting process.
|


